Jul
2018
How-to: Create Your Own Karaoke Track with Adobe Audition
I’ll be the first to admit it: I take karaoke a little too seriously. Like, way too seriously. If it means losing my voice just to impress the room with my rendition of a Whitney Houston ballad, I will do it in a heartbeat. But what happens when you’ve found the perfect karaoke song, one that’s right in your range and bound to get the party started, but you can’t find a karaoke version of it anywhere? Well, honey, you’ll just have to create your own! Using Adobe Audition, the process of making your own karaoke instrumental to belt along with is super simple.
You Will Need:
-Adobe Audtion CC 2018
-An .mp3 or .wav of your chosen song
-Ears
Step 1: Create a new Audition Multitrack Session
If you’ve dabbled in Audition before, this should be self-explanatory. If not, aquaint yourself with the Multitrack function here.
Step 2: Import your chosen song and place it into your track of choice
Aren’t familiar with importing media into Audition, either? Try this turotial on for size.
Step 3: In the “Effects” rack, select “Stereo Imagery”>”Center Channel Extractor”
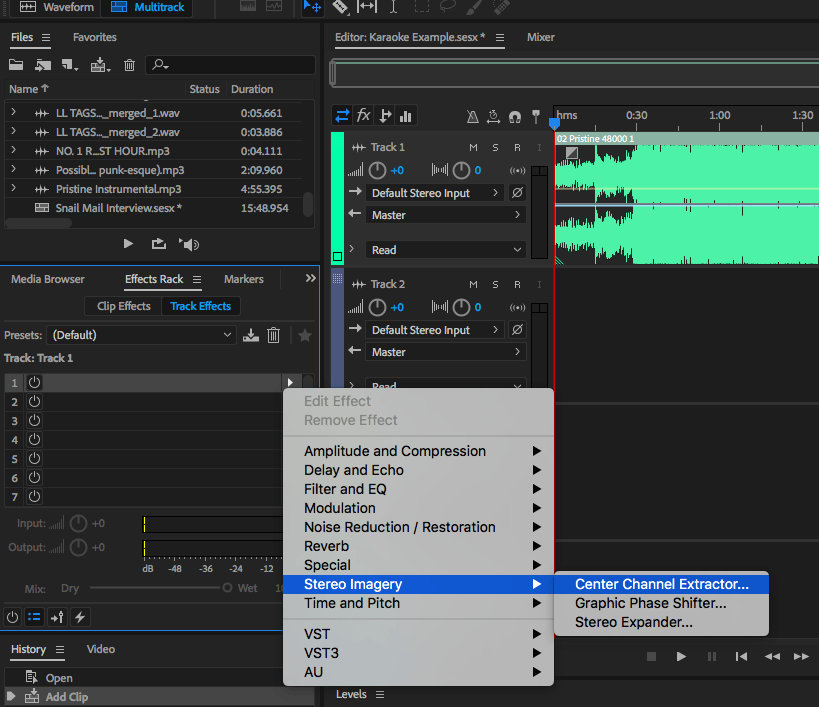
The Center Channel Extractor will be your best friend when it comes to creating the karaoke tracks of your dreams (and can also do a lot of other neat things that we won’t cover in this how-to).
Step 4: When the Rack Effect adjuster appears, use the drop down menu next to “Presets” to select “Karaoke (Drop Vocals 20 dB)”

Adobe is filled with all kinds of useful presets, and this one will serve as our foundation to bring down the volume of the vocals in the song.
Step 5: Give the track a listen with this effect added
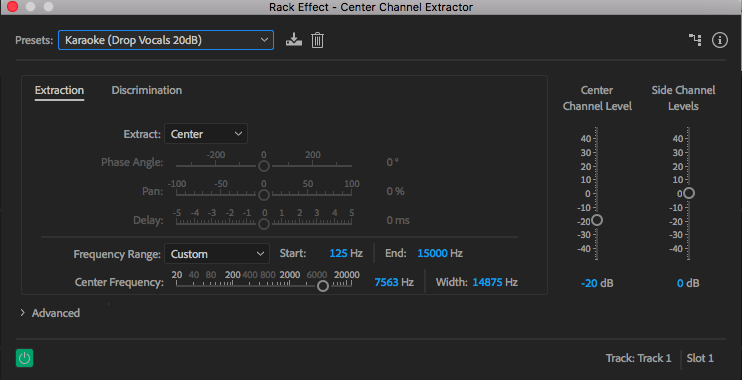
Notice how the Center Channel Levels and Side Channel Levels shifted to -20 dB and 0 db, respectively, once adding the Karaoke preset. You should notice an immediate difference in the volume level of the song’s vocals, but depending on how the track was mixed there may still be some residual vocals to take care of. Don’t fear, there are still a few more adjustments you can make to take care of those.
Step 6: Adjust your Discrimination Settings (particularly Crossover Bleed and Phase Discrimination)
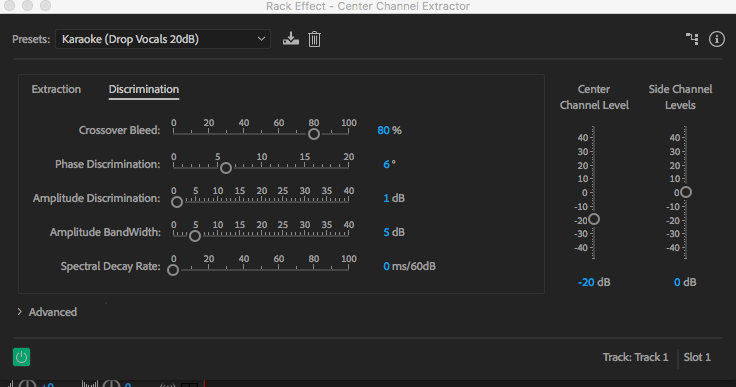
Click on the “Discrimination” tab next to “Extraction” to bring up even more options to fine-tune your karaoke track. Crossover Bleed and Phase Discrimination will be especially helpful in achieving the sound you are looking for. Play your track in Audition while you play with these settings, as each song will require different levels to get the right sound.
Step 7: Export your new karaoke track and sing your heart out!
Once you have your track mixed to your liking, export your file and get ready to blow your friends away with both you tech and vocal abilities.
As an example, I took the song “Pristine” by WoW’s favorite indie darling Snail Mail and mixed it into a mostly instrumental, karaoke ready track. You can listen to the final results below:
I hope this how-to was helpful! What songs are you dying to make into your next karaoke smash-hit? Let me know down below!